
How to Use Google Flow — 2026 Step-by-Step Guide for Beginners

September 11, 2026

What You’ll Learn
Tools Used: Google Flow, Veo 3.1, Gemini Omni, Nano Banana, SceneBuilder
What Is Google Flow?
Google Flow is an AI filmmaking and visual creation workspace built by Google Labs. It launched in May 2025 at Google I/O as a video generation tool powered by Veo. In February 2026, Google merged three separate tools — Whisk, ImageFX, and the original Flow — into one unified workspace. If you used Google Whisk before it shut down in April 2026, Flow is what replaced it and runs everything Whisk did, plus a lot more.
The tool lives at flow.google and runs on three of Google’s most capable AI models: Veo 3.1 handles video generation, Nano Banana handles image generation, and Gemini Omni handles video editing through natural language instructions. The combination makes it possible to go from a text prompt to a finished multi-clip scene inside a single browser tab.
What sets Flow apart from most AI video tools is native audio. Veo 3.1 generates ambient sound, background noise, and even spoken dialogue in the same generation pass as the video. You put a line of dialogue in quotes in your prompt and it gets spoken — not added separately as a voiceover layer. That’s still a rare capability in 2026, and it’s available even on the free tier.
Who Should Use Google Flow?
Flow isn’t for everyone, but it’s the right tool for a specific set of people.
Content creators who produce short-form video for YouTube, Instagram Reels, or TikTok can use Flow to generate B-roll, scene transitions, or atmospheric clips without hiring a videographer. A 6-second cinematic drone shot that used to cost money to produce can now be generated in under a minute.
Small business owners who need promotional video content but don’t have a production budget will find the free tier genuinely useful for product cutaways, social ads, and event promo clips.
Writers and storytellers who want to prototype short films or visual narratives can use SceneBuilder to assemble multiple generated clips into a coherent sequence — a real storyboard tool, not just a mood board.
Educators and students who need visual explainers or presentation clips can use Flow’s text-to-video capability for course material, presentations, or academic projects.
What it’s not ideal for: avatar-based spokesperson videos (look at HeyGen instead), long-form documentary editing, or any workflow that needs frame-by-frame editing control (Runway is better for that).
Go to flow.google
Open flow.google in Chrome or a Chromium-based browser. Google recommends Chrome — some features don’t render correctly in Safari. You don’t need to install anything.
Sign in with a personal Gmail account
Use a personal Gmail, not a Google Workspace account tied to a company or school. Google restricts some Flow features on organizational accounts. If you sign in and see limited options, that’s usually why.
Start a new project
Click New Project on the dashboard. You’ll see a blank workspace with a prompt input field in the center, a model selector at the top, and your asset library in the left panel. Your daily free credits (50 as of September 2026) are shown in the top-right corner.
Choose your generation mode
Before typing a prompt, select the mode that matches what you want to create. The main options are Text to Video (generate from a written description), Frames to Video (use an image as the start or end frame), and Ingredients to Video (use saved character or object references — more on this in a later section). New users should start with Text to Video.
Set your aspect ratio and clip length
On the right-side panel, pick your aspect ratio (16:9 for standard video, 9:16 for vertical/mobile) and clip duration. Options are 4, 6, or 8 seconds on Veo 3.1, and up to 10 seconds on Gemini Omni Flash. Each generation costs credits — longer clips cost more. Start with 6 seconds at Fast quality (not Quality) while you’re testing prompts to conserve credits.
Write your first prompt and generate
Keep your first prompt specific. “A golden retriever running through tall grass at sunset, slow motion, warm light, handheld camera” will produce a much better result than “dog running outside.” Click Generate and wait roughly 30–90 seconds for the clip to render.
Free-tier watermark
Free-tier videos include a visible Google watermark and cannot be used commercially. Paid plans remove the watermark and include commercial licensing.
How to Write Prompts That Actually Work in Google Flow
Prompt quality is the single biggest factor in your output. Flow understands plain English — no special syntax, no negative prompts, no weighting system. What it responds well to is specificity.
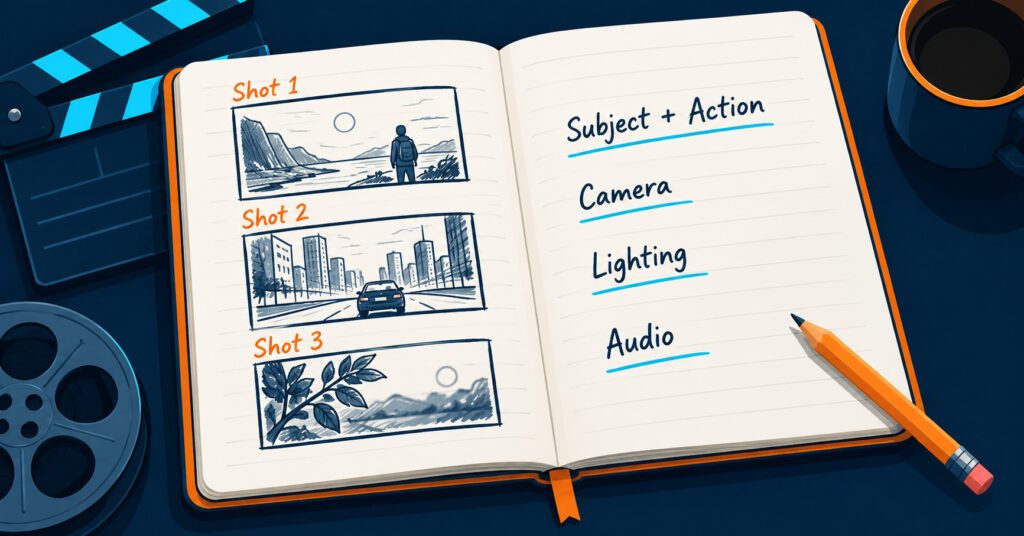
A strong Flow prompt answers four things: what’s in the shot, how it’s moving, how it’s lit, and how the camera is positioned. Every missing detail is a decision the model makes for you, and those decisions are often not what you wanted.
Prompt structure that works in Google Flow
[Subject + action] + [environment + atmosphere] + [lighting] + [camera movement/type]

Example:
A Japanese convenience store at 2am, rain streaking the window outside,
warm fluorescent interior light, a single employee reading a magazine behind the counter,
slow push-in on a stationary tripod, photorealistic
For dialogue — put the spoken line in quotes inside your prompt
A woman in a coffee shop looks directly at camera and says "I haven't slept in three days,"
then looks back down at her laptop. Natural indoor light. Handheld slight movement.
Save credits while iterating
Generate a 4-second Veo 3.1 Lite clip first as a draft. Once the framing and content are right, regenerate at full quality. This saves credits during iteration.
How to Keep Characters Consistent with Ingredients
Character consistency is the problem that ruins most multi-clip AI video projects. Generate the same character twice with a plain text prompt and you’ll get two different people. Ingredients solves this.
An Ingredient is a saved visual reference — a character, an object, or a style — that Flow uses as a consistent anchor across multiple generations. Think of it as a casting file for your AI film.
How to create an Ingredient:
- Click the + icon in the Ingredients panel on the left sidebar
- Upload a clear, well-lit photo of your character or object (or generate one first using Nano Banana image generation inside Flow)
- Give the ingredient a name — for example
main_characterorred_sports_car - Save it to your project library
How to use it in a generation:
In the prompt field, type @ followed by your ingredient name. Flow will pin that visual reference into the generation.
@main_character walks into a brightly lit office, adjusting their jacket.
Wide shot. Natural daylight from large windows. Tracking shot.
Every clip with @main_character will use the same visual identity. It won’t be pixel-perfect — the model still interprets clothing, expression, and lighting — but the character’s face, build, and general look stays consistent across shots. For a series of connected scenes, this changes the workflow entirely.
The Ingredients system currently works best with clear, front-facing reference images. Profile shots or heavily stylized references produce inconsistent results. Stick to natural, well-lit photos for the reference image.
How to Build a Multi-Clip Scene in SceneBuilder
Once you have individual clips generated, SceneBuilder is where you assemble them into a finished piece. It’s Flow’s built-in timeline editor — simple compared to Premiere or DaVinci Resolve, but good enough to build a coherent 60-second sequence without leaving the tool.
To open SceneBuilder: Click SceneBuilder in the top navigation bar. You’ll see a horizontal timeline at the bottom and your generated clips in the project library on the left.
Building a scene:
- Drag clips from the library into the timeline in story order
- Use the Jump To feature to transition a character from one location to another while preserving their appearance — useful for scene cuts
- Use Scene Extension on any clip to generate additional frames that extend its duration while maintaining visual continuity
- Click Trim on any clip to cut the start or end frames if the generation has a weak opening or a bad ending frame
- Arrange, preview, and repeat until the sequence feels right
Exporting: Click Export in the top-right of SceneBuilder. For paid plans, you get a watermark-free MP4. Free tier exports include the Google watermark. There is no option to export individual audio tracks separately.
Flow’s SceneBuilder doesn’t do audio mixing — there’s no volume control, no timeline layers, no music track import. What you get is the audio that Veo generated natively with each clip. If you need custom music or voiceover editing, you’ll need to bring the exported MP4 into a separate audio tool.
Pros
- Native audio is genuinely useful. Most AI video tools deliver silent clips. Flow's Veo 3.1 generates ambient sound, sound effects, and spoken dialogue in the same generation pass. For short social videos and ads, it eliminates a whole post-production step.
- Free tier is actually usable. 50 daily credits resets every day — enough for 2–5 video generations per day depending on clip length and quality setting.
- Ingredients solve a real problem. Character consistency across clips used to require workarounds. The Ingredients system makes it straightforward for anyone building a narrative with recurring characters.
- SceneBuilder keeps your workflow in one place. Generating and assembling clips in one tab is genuinely faster.
- Broad availability. Flow works in 140+ countries, and paid plans start at $4.99/month.
Cons
- Credit system is confusing. Flow runs on Google AI plan credits. Figuring out cost per generation requires checking a separate resource, and costs change by model, clip length, and quality setting.
- Clips max out at 8–10 seconds. Every video over 10 seconds requires multiple clips stitched in SceneBuilder.
- Workspace accounts get reduced access. Using a Google Workspace (company or school) email limits which features appear.
- No audio editing tools. What Veo generates is what you get — no volume control, no music import, no audio editing inside Flow.
- SceneBuilder is basic. Usable but limited. Not a replacement for real video editing software.
Google Flow Pricing
Flow doesn’t have its own subscription. You access it through Google AI plans, which also cover Gemini, NotebookLM, and other Google AI tools.
| Plan | Monthly Price | AI Credits | Video Tier |
|---|---|---|---|
| Free | $0 | 50 daily credits | Veo 3.1 + watermark |
| AI Plus | $4.99/mo | ~200/mo + 50 daily | Nano Banana Pro images |
| AI Pro | $19.99/mo | ~1,000/mo + 50 daily | Full toolset, 1080p upscaling |
| AI Ultra | $99.99–$199.99/mo | Up to 25,000/mo | 4K upscaling, half-price video credits |
Prices verified September 2026. Credit costs per generation vary by model and clip length — a Fast Veo 3.1 clip costs roughly 20 credits; Quality costs around 100. Check Google’s current plans page before subscribing, as these have changed multiple times in 2026.
For most beginners, the free tier plus occasional top-up usage is enough to experiment and learn the tool. AI Pro at $19.99/month makes sense if you’re producing video regularly and need commercial-use rights.
Google Flow vs Runway
These are the two most-discussed AI video tools in 2026, and they’re genuinely different products aimed at different workflows.
Google Flow wins on native audio, free tier usability, and workflow integration. If you generate a scene and want the audio to match what’s on screen without any extra steps, Flow is the only realistic option. The Ingredients system and SceneBuilder also give it a complete-project feel that pure generation tools lack. The trade-off is that editing control is limited — you can trim and sequence clips, but you can’t do much more than that inside the tool.
Runway wins on editing depth. Its Motion Brush lets you paint movement instructions directly onto objects in your frame — a level of control that doesn’t exist in Flow. Runway Gen-4.5 also produces excellent video quality, and its editing suite is closer to a professional non-linear editor than anything Flow offers. The catch: every Runway video is silent. Audio is entirely separate, which means a post-production step that Flow eliminates.
Pick Flow if you need native audio, a free starting point, or an end-to-end workflow in one workspace. Pick Runway if precise editing control matters more than audio and you’re comfortable handling sound separately.
For more AI tool guides, tutorials, and the latest coverage, visit the KnowAIData
Frequently Asked Questions
Q1. Is Google Flow free?
Yes. The free tier gives you 50 AI credits per day, which is enough for 2–5 video generations depending on clip length and quality. Free-tier videos include a Google watermark and aren’t licensed for commercial use.
Q2. What's the difference between Google Flow and Veo 3?
Veo 3.1 is the AI model that generates the video. Google Flow is the full creative workspace — it includes the Ingredients system, SceneBuilder, image generation, camera controls, and Gemini editing on top of Veo. You can access Veo 3.1 directly through Google AI Studio or the API, but Flow is where the full filmmaking workflow lives.
Q3. Can I use Google Flow videos commercially?
Only on paid plans. Free-tier generations include a Google watermark and cannot be used commercially. AI Pro and above include commercial licensing — confirm this on Google’s current terms before using for paid client work.
Q4. Why can't I see all features in Google Flow?
Usually because you’re signed in with a Google Workspace (company or school) account. Some Flow features are restricted on organizational accounts. Switch to a personal Gmail to get full access.
Q5. How long can videos be in Google Flow?
Individual clips max out at 8 seconds on Veo 3.1 or 10 seconds on Gemini Omni Flash. For longer videos, you generate multiple clips and assemble them in SceneBuilder. There’s no hard cap on finished project length — it depends on how many clips you chain together.